


How to Create a React JS app with create-react-app?
In this article, you will learn how to create a React application using create-react-app (CRA). There are also other ways to create React applications but here we are using CRA.
Step 1: Setup Your Development Environment
Before starting to build the React app, you need to ensure that your development environment is properly set up. Here’s what you’ll need:
1.1) Node.js
Make sure you have Node installed on your machine. You can download it from the official Node.js website. CRA requires a Node version of at least 10.
Note: You can check the version of the Node by running the below command in your Command Prompt:
node -v
1.2) NPM (Node Package Manager)
It is included in the installation of Node. You need the version of npm should be at least 5.2.
Note: You can check the version of NPM by running the below command:
npm -v
1.3) Text Editor or IDE
Choose a good text editor or integrated development environment (IDE) to write your code. I recommend Visual Studio Code. You can download it at code.visualstudio.com.
Step 2: Create a New React App
To create a new React app, open the directory in which you want to create an app in Visual Studio Code. Then open your terminal (in VSCode, go to View > Terminal) and run the following command:
npx create-react-app my-react-app

Replace “my-react-app” with the name you want for your app. This command will create a new directory with the specified name and set up a basic React project structure.
Step 3: Explore the Project Structure
Navigate to the newly created app directory using the terminal:
cd my-react-app
Here, you’ll find the basic structure of your React app as shown in the below image:
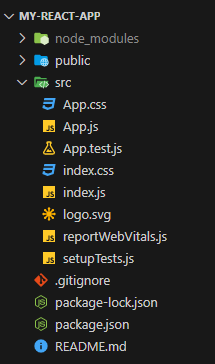
src: This directory contains the main source code of your app.
public: Static assets like HTML files, images, etc., go here.
package.json: Configuration and dependencies for your app.
App.js: The main React component.
Step 4: Run the App Locally
To see your app in action, run the following command in your terminal (in VSCode, go to View > Terminal):
npm start

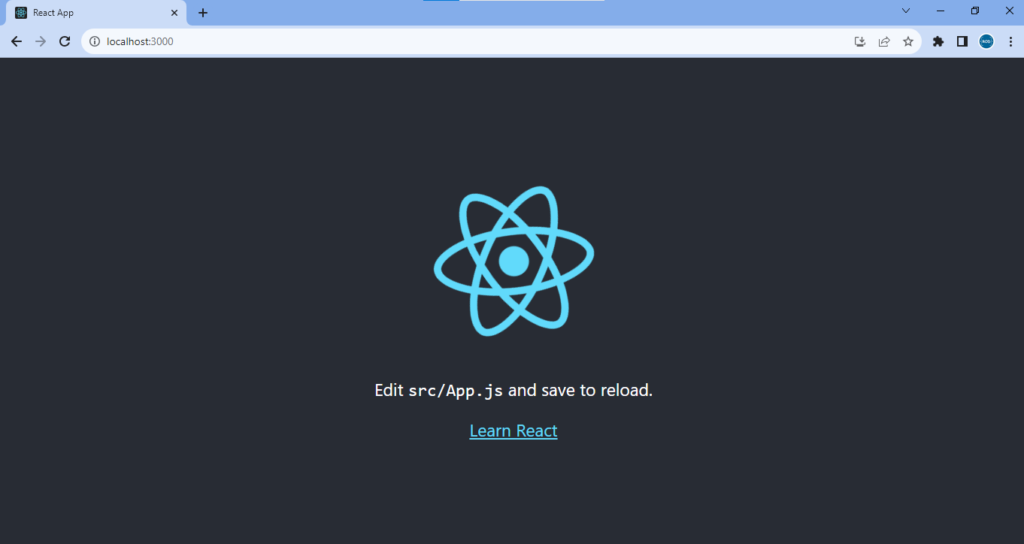
This command starts the development server and automatically reflects any changes made to the code in the web browser. The development server will start on the http://localhost:3000/.
You can see the default page for our app as shown in the below image:
Step 5: Update the App Component
Let’s change something on the default page. Open the App.js file it contains the below code:
import logo from './logo.svg';
import './App.css';

function App() {
  return (
    <div className="App">
      <header className="App-header">
        <img src={logo} className="App-logo" alt="logo" />
        <p>
          Edit <code>src/App.js</code> and save to reload.
        </p>
        <a className="App-link" href="https://reactjs.org" target="_blank" rel="noopener noreferrer">
          Learn React
        </a>
      </header>
    </div>
  );
}

export default App;
In the App component remove the “p” and “a” tags, and add an “h1” element with the name of our project, “My React App”.
import logo from './logo.svg';
import './App.css';

function App() {
  return (
    <div className="App">
      <header className="App-header">
        <img src={logo} className="App-logo" alt="logo" />
        <h1>My React App</h1>
      </header>
    </div>
  );
}

export default App;
When you save (Ctrl + S), you will see our page automatically update to look like this:

Summary
In this article, we learned how to create a single-page React application using create-react-app (CRA). We also covered React JS prerequisites and application folder structure.
Your input matters- comment your thoughts!☻


Good explanation!!!
Thanks tejas!!