


Creating Custom Properties in User Profiles in SharePoint Online
Introduction
In SharePoint Online, user profiles play a crucial role in personalization, collaboration, and search functionality. By default, SharePoint Online provides several standard user profile properties like name, email, and department. However, you may have specific requirements to add custom properties to user profiles to store additional information unique to your organization. This tutorial will guide you through the steps to create custom properties in user profiles in SharePoint Online.
Steps to Create Custom Properties
Step 1. Access the SharePoint Admin Center using the following link: https://tenant-admin.sharepoint.com/
Log in using your administrative credentials to access the SharePoint Admin Center..
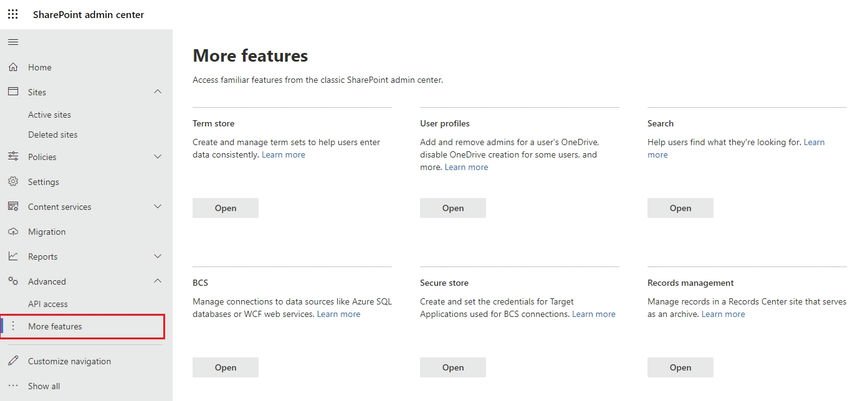
Step 2. After entering the SharePoint Admin Center, locate the navigation panel on the left-hand side. Click on “Additional features” in the left panel.
By following these steps, you can access the SharePoint Admin Center and navigate to the “Additional features” section.
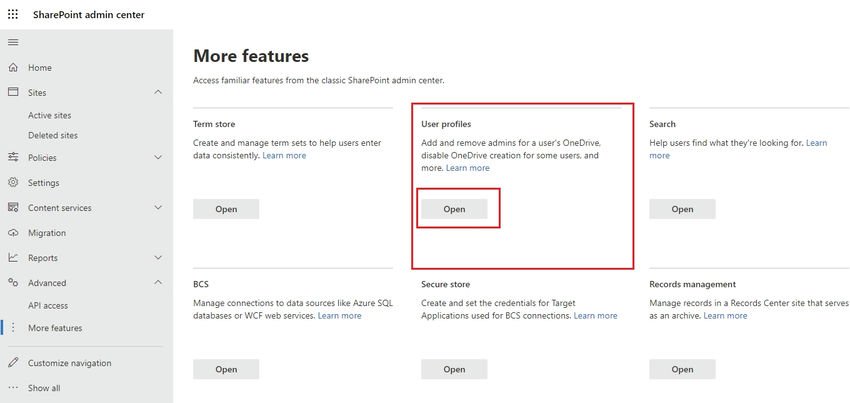
Step 3. Once on the “User profiles” page, find the “Access” button in the User Profiles section. Click on the “Access” button to proceed to the next page.
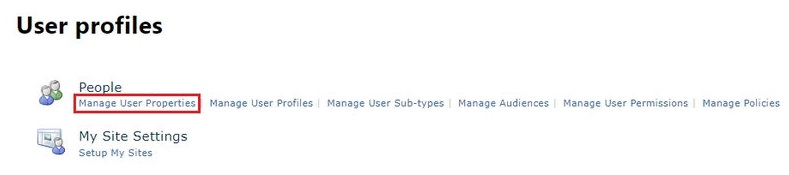
Step 4. On the new page that opens, choose “Manage user properties” to access the user profile properties configuration.
Step 5. On the “Manage user properties” page, there is a button labeled “Add New Property.” Click on this button to start the process of creating a new custom property.

Step 6. Defining the Custom Property Details
It is essential to provide precise and accurate details when defining the custom property to ensure its smooth integration within the user profiles. Follow these guidelines:
- Property Name: Enter a unique name for the custom property, avoiding spaces and special characters. A clear and descriptive name is recommended.
- Display Name: Provide a user-friendly name for the property that will be visible in user profiles. This name should be easy to understand and informative.
- Type: Select the appropriate data type for the property from options such as text, integer, date/time, or Boolean. Choose the type that aligns with the intended data for the property.
- Length: If applicable, set the maximum length of the property to accommodate the expected data length.
- Policy Settings: Choose whether the property can be edited by users or restricted to administrators. Select the appropriate setting based on your organization’s needs.
- Default Privacy Setting: Define the default visibility of the property in user profiles. Consider the sensitivity of the information and set privacy settings accordingly.

Step 7. After finalizing the custom property details, select the “Save” button to save your changes.
Conclusion
By incorporating custom properties into user profiles in SharePoint Online, you can personalize the user experience, foster better collaboration, and enhance search results within your SharePoint environment. Custom properties offer flexibility, allowing you to store and utilize specific information that aligns with your organization’s unique needs. This customization empowers you to optimize your SharePoint experience and leverage the platform’s capabilities to their fullest extent.

Awesome Content! Thank you!