


How to Use Power Automate to Print Data in a Table Inside a Word Document
Introduction
This article explains how to create a table in a Word document using Power Automate, SharePoint Lists, and SharePoint Document Libraries, and save the Word files in the library. Sometimes, we need to put data from a SharePoint List or other sources into a table in a Word document. We can do this with Power Automate, Word templates, and SharePoint Lists. We also need a document library to store the Word templates.
Prerequisite
- Power Automate
- SharePoint List
- SharePoint Document Library
I divide this article into two-part,
1.Create Word Template
2.Create Power Automate Flow
Create Word Template
Steps to Create Word Template,
Step 1: Open Word and insert a table with two rows. Add columns as needed; in this example, we’ll use a table with two rows and three columns.
Step 2: Add a heading to your table in the first row.
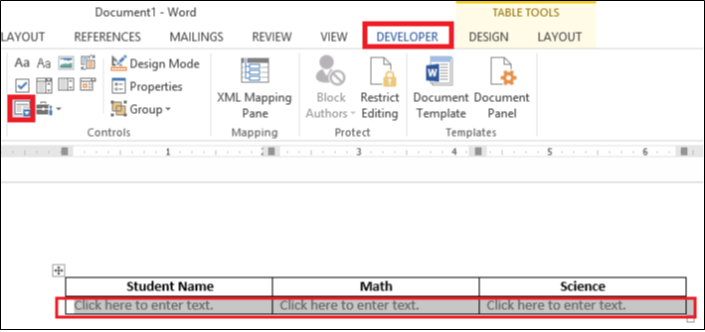
Step 3: Go to the “Developer” tab in Word.

If you don’t see the Developer tab then visit this link to display the DEVELOPER tab.
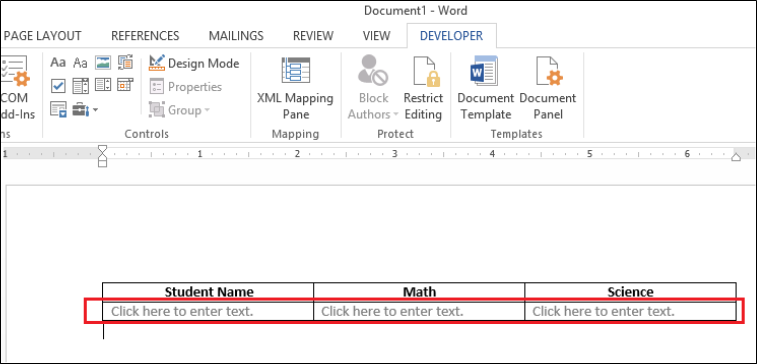
Step 4: Add Plain Text Content Control from the DEVELOPER tab for each column.

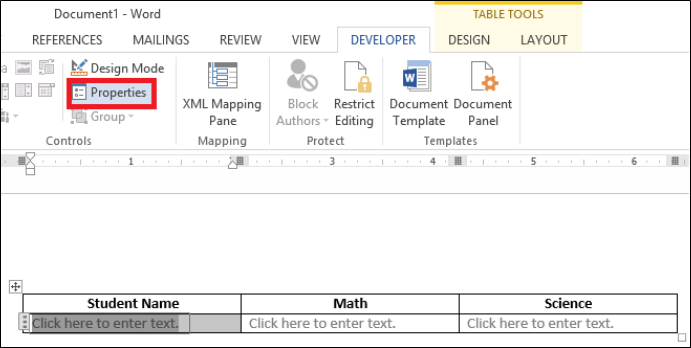
Step 5: Change the properties of the control. First, select your control, then click on the “Property” button located in the “Developer” tab.
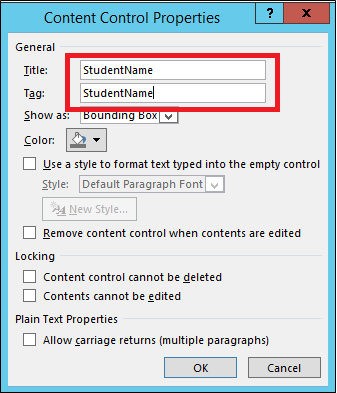
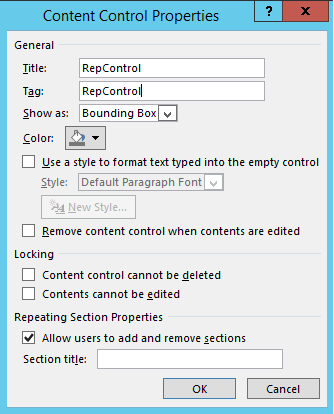
Step 6: Once you click on the Properties button, a popup window will open. In this window, add a Title and Tag for your control, then click on the OK button. Repeat these steps for each control.
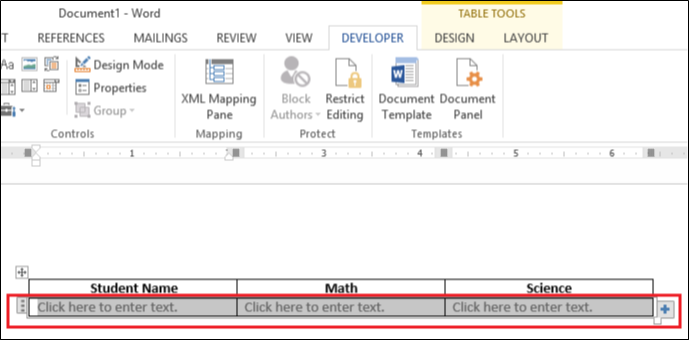
Step 7: Select the entire row that contains the Plain Text content control, then click on the “Repeating Section Content Control” in the DEVELOPER tab.
Step 8: Once clicked, the Repeating Section Content Control will be added to the selected row.
Step 9: Select the Repeating Section Content and set its properties similar to Step 5.
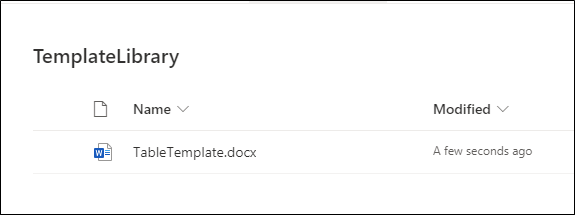
Step 10: Save the document and upload it to the SharePoint Document Library that you’ve already created for storing templates.
Create Power Automate Flow
Steps to Create Flow,
Step 1: Open Power Automate.
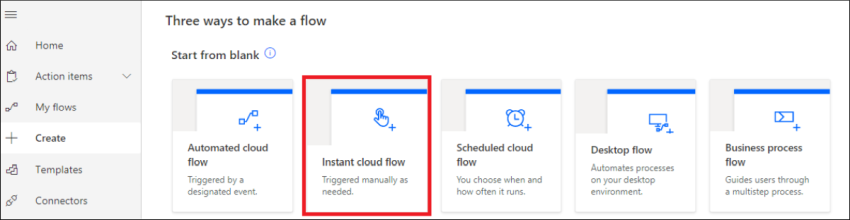
Step 2: Select the “Create” option from the left navigation panel, then choose “Instant cloud flow” (you can select any time as per your needs).
Step 3: After selecting the above option, a dialog box will open. Enter the necessary details and click on the “Create” button.
Flow Name: Enter a name for your flow. Choose the trigger that best fits your requirements from the list provided.

Step 4: Once you click to create, your flow page will open with your selected actions.
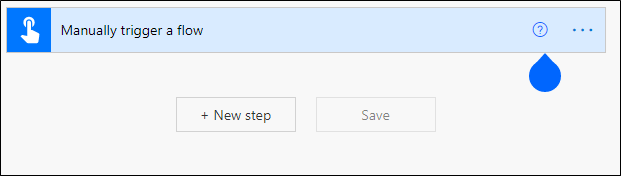
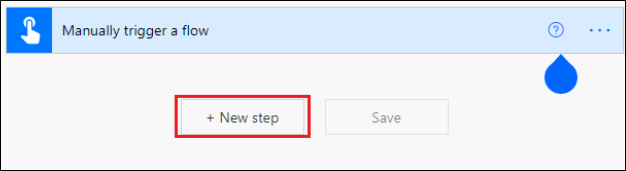
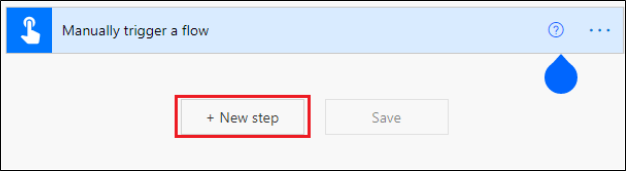
Step 5: Click on “New Step.”.
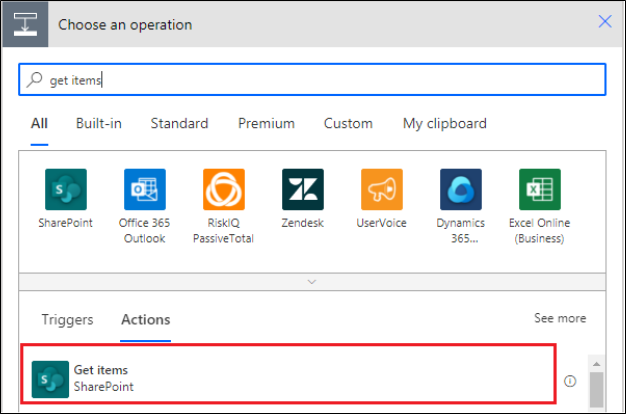
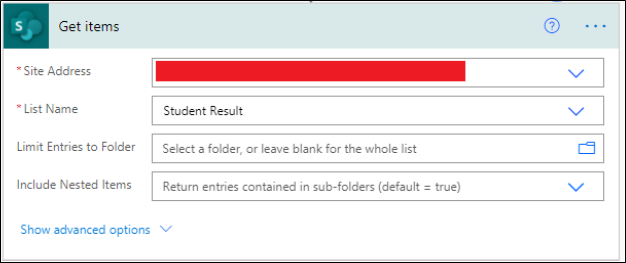
Step 6: Add the “Get items” action.
Step 7: Once the action is added, select your site and list name.
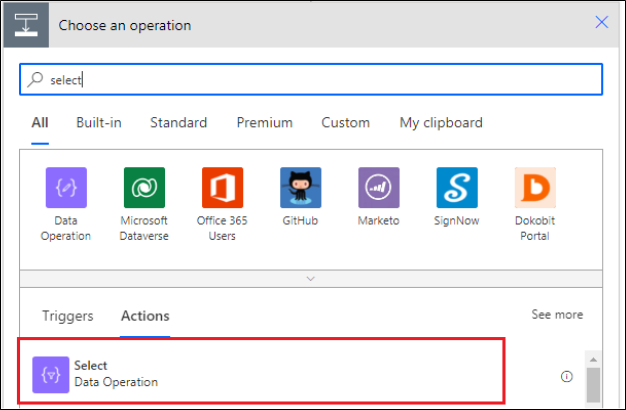
Step 8: Add a new action called “Select.”
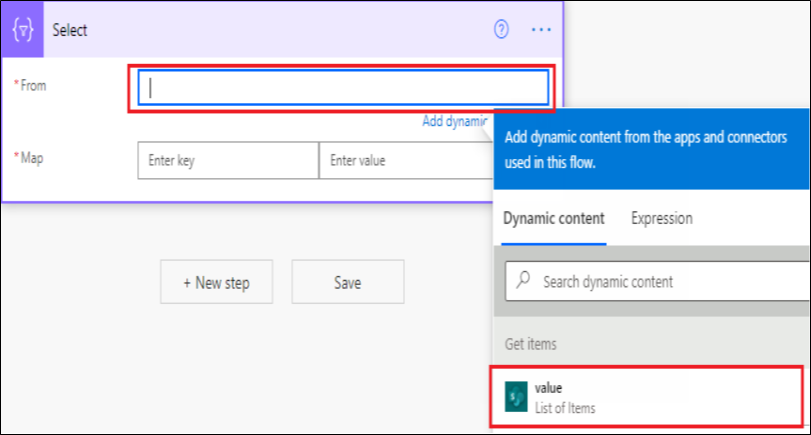
Step 9: From the “Get Items” action, select the value you need.
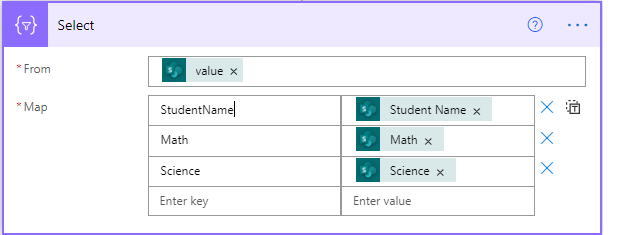
Step 10: In the mapping section, enter the same key as set in your document template’s Plain Text control for the Title, and select your list fields for the corresponding values.
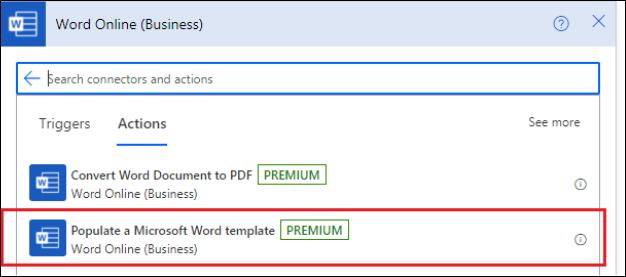
Step 11: Add the “Populate a Microsoft Word template” action.
Step 12: Select your site and choose the template from the document library where you uploaded it.
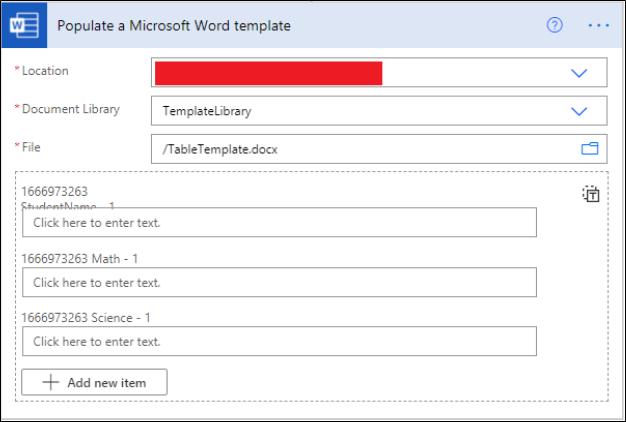
Step 13: Click on “Switch to input entire array.”

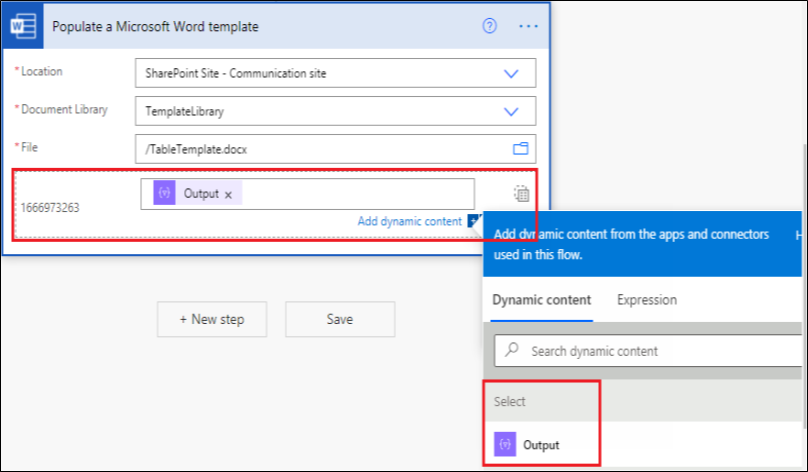
Step 14: Select the “Output” of the Select action.
Step 15: Add the “Create file” action in SharePoint. Select the site and document library where you want to create the file. Choose “Microsoft Word document” for the File Content.

Step 16: Save your flow and proceed to test it.
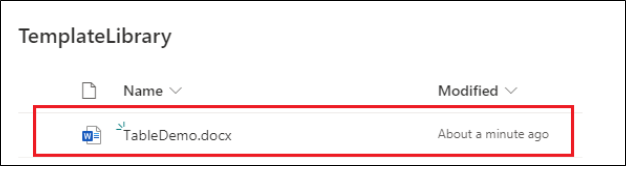
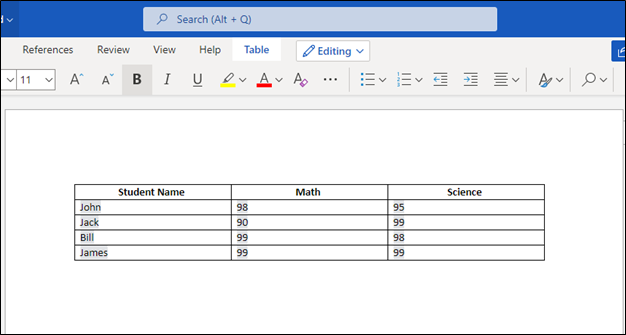
Output
Summary
In this article, I’ve covered how to create a Word document template and set up Power Automate to print tables inside Word files in SharePoint. Additionally, we explored saving these document files into a document library using Power Automate.


