


Capture Photos in React JS: A Simple Tutorial
Overview
Capturing photos in a web application has become a common requirement, especially with the rise of video conferencing, social media, and online collaboration tools. React.js, a popular JavaScript library for building user interfaces, offers various libraries and components that simplify this task. One such library is “react-webcam”, which allows developers to easily integrate webcam functionality into their React applications and capture photos.
In this article, we will explore how to use the “react-webcam” library to enable photo capture in a React.js application.
What is react-webcam?
“react-webcam” is a simple and efficient React component that wraps the HTML5 media API and provides an easy-to-use interface for capturing video and photos from the user’s webcam. It abstracts away the complexities of interacting with the media devices, making it convenient for developers to add webcam functionality to their React applications.
Getting Started
Before we dive into the implementation, ensure you have Node.js and npm (Node Package Manager) installed on your system. If you haven’t already set up a React.js project, you can do so by using Create React App or any other preferred method.
To start a new React.js project using Create React App, open your terminal and run the following command:
npx create-react-app photo-capture-app
cd photo-capture-app
Next, install the “react-webcam” and “bootstrap” package:
npm install react-webcam bootstrap
Implementation
In your React.js project, navigate to the file where you want to implement photo capture. For example, you can create a new component called “CameraComponent.js.”
Start by importing the necessary modules and setting up the component:
import React, { useState } from "react";
import Webcam from "react-webcam";
import 'bootstrap/dist/css/bootstrap.min.css';

const FACING_MODE_USER = { facingMode: 'user' }; //Front Camera
const FACING_MODE_ENVIRONMENT = { facingMode: { exact: 'environment' } }; //Back Camera

function CameraComponent() {
  const webcamRef = React.useRef(null);
  const [image, setImage] = useState(null);
  const [videoConstraints, setVideoConstraints] = useState(FACING_MODE_USER);

  const getListOfVideoInputs = async () => {
    const mediaDevices = await navigator.mediaDevices.enumerateDevices();
    return mediaDevices.filter(device => device.kind === 'videoinput');
  }

  const switchCamera = async () => {
    const videoInpuList = await getListOfVideoInputs();
    if (videoInpuList.length > 1) {
      const currectVideoConstraints = { ...videoConstraints };

      // If the current constraint is the front camera, switch to the back camera.
      if (JSON.stringify(currectVideoConstraints) === JSON.stringify(FACING_MODE_USER)) {
        setVideoConstraints(FACING_MODE_ENVIRONMENT);
      }
      // If the current constraint is the back camera, switch to the front camera.
      if (JSON.stringify(currectVideoConstraints) === JSON.stringify(FACING_MODE_ENVIRONMENT)) {
        setVideoConstraints(FACING_MODE_USER);
      }
    } else {
      alert('Device have only one camera.');
    }
  };

  const capture = React.useCallback(() => {
    const imageSrc = webcamRef.current.getScreenshot();
    setImage(imageSrc);
  }, [webcamRef, setImage]);

  const retake = () => setImage(null);

  const upload = () => {
    // Do something with the image source, such as upload it to a server
    alert('Your photo uploaded successfully!');
    setImage(null);
  };

  return (
    <div className="d-flex flex-column align-items-center pt-3 container">
      <h3>Photo Capture In React</h3>

      <div className="container">
        <div className="row justify-content-center">
          <div className="col-12 col-md-6 mb-3 mb-md-0 d-flex flex-column">
            {image ? (
              <img src={image} alt="Captured" />
            ) : (
              <Webcam
                audio={false}
                ref={webcamRef}
                screenshotFormat="image/jpeg"
                videoConstraints={videoConstraints}
              />
            )}
          </div>
        </div>

        <div className="row justify-content-center">
          <div className="col-12 col-md-6 mt-2 d-flex justify-content-center align-items-center flex-wrap">
            {image ? (
              <button className="btn btn-primary me-2 mb-2" onClick={retake}>
                Re-Take
              </button>
            ) : (
              <>
                <button className="btn btn-secondary me-2 mb-2" onClick={switchCamera}>
                  Switch Camera
                </button>
                <button className="btn btn-primary me-2 mb-2" onClick={capture}>
                  Take Photo
                </button>
              </>
            )}
            {image && (
              <button className="btn btn-success mb-2" onClick={upload}>
                Upload
              </button>
            )}
          </div>
        </div>
      </div>
    </div>
  );
}

export default CameraComponent;
In the code above, we import the necessary modules from React and “react-webcam”. We then set up the CameraComponent functional component, which contains a Webcam element from “react-webcam” to display the webcam stream. The webcamRef is a reference to the webcam instance, which we will use later to capture the photo.
The capture function is responsible for capturing the photo from the webcam when the user clicks the “Take Photo” button. It uses the getScreenshot() method from the webcamRef to get the base64-encoded image data and sets it in the image state.
The switchCamera function is responsible to switch between front and back cameras if multiple video inputs are available.
Finally, we render a button to trigger the photo capture and, if a photo has been captured, display the preview of the captured photo.
Using the CameraComponent
Now that we have created the CameraComponent, we can use it in our main App.js or any other component to showcase the photo capture functionality. Open your App.js file and import the CameraComponent:
import React from 'react';
import CameraComponent from './CameraComponent';

function App() {
  return (
    <div>
      <CameraComponent />
    </div>
  );
}

export default App;
In the above code, we import the CameraComponent and place it inside the App component’s JSX, which renders the webcam stream and the “Capture Photo” button on the screen.
Output
Now, start your React development server by running:
npm start
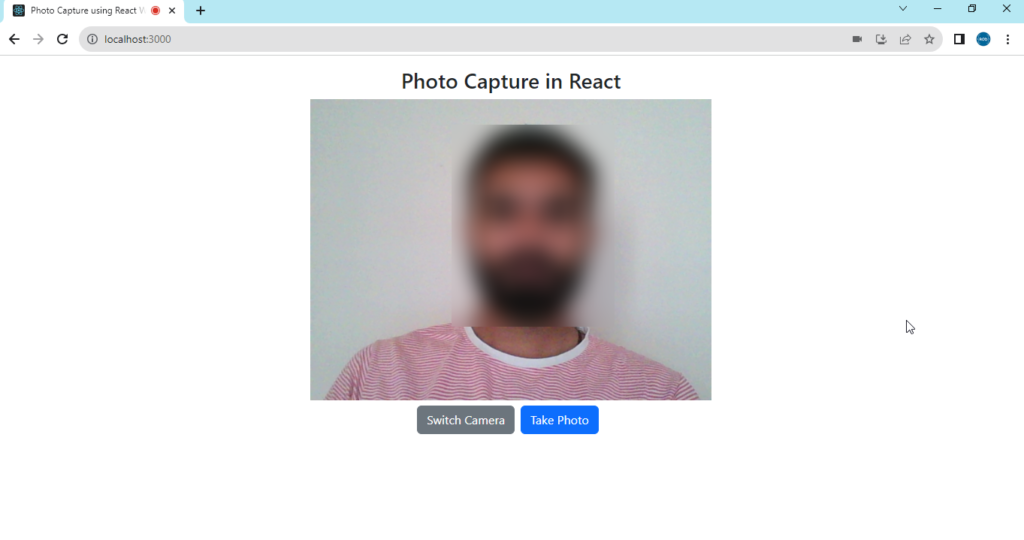
Visit the development server URL in your web browser (typically http://localhost:3000), and you can see the output looks likes the image below:
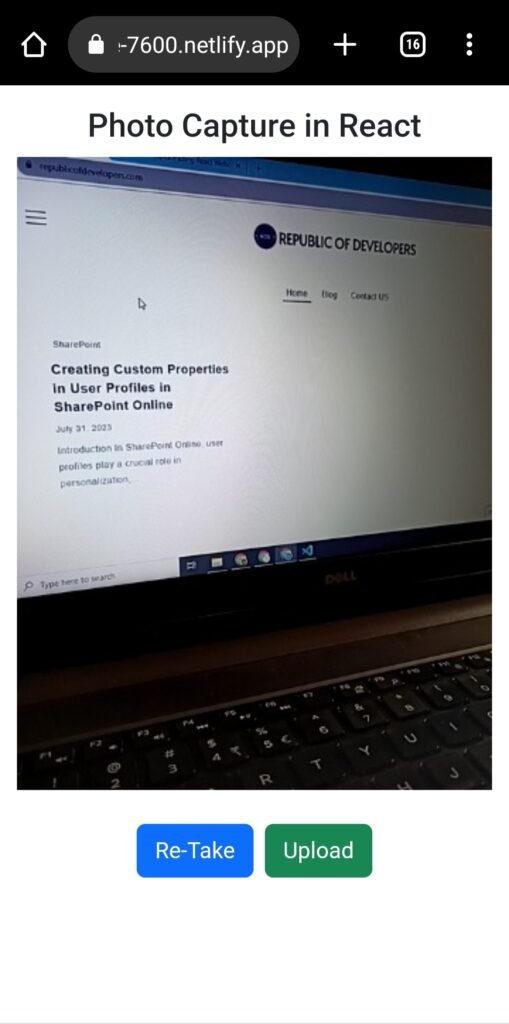
When you click the “Take Photo” button, the photo will be captured from the webcam, and you’ll see the preview of the captured photo with Re-Take and Upload buttons.
Conclusion
In this article, we explored how to implement photo capture in a React.js application using the “react-webcam” library. We set up a simple component that uses the webcam to display the video stream and a button to capture photos. When the user clicks the button, we capture the photo and display a preview of the captured image.
By following the steps and code examples provided in this article, you can easily integrate photo capture functionality into your React.js applications, making them more interactive and engaging for users.


